 Skip to content
Security is a top priority for both homeowners and businesses, and wireless security cameras provide a convenient and effective solution for monitoring your property. At Shenzhen JER Technology Co., Ltd, we specialize in providing high-quality security products, including IP cameras, analog cameras, DVRs/NVRs, wireless cameras, solar-powered wireless cameras, and 4G cameras. As a trusted OEM provider, we help clients enhance their security systems worldwide with reliable and innovative solutions.
To simplify your installation process, we’ve included product installation videos throughout this guide. These videos will walk you through each step, ensuring a seamless setup for your wireless security camera system. Let’s get started!
Step 1: Planning and Preparation
1.1 Assess Your Security Needs:
- Determine the areas you want to monitor (e.g., front door, backyard, garage).
- Identify the number of cameras needed to cover these areas effectively.
- Consider the type of wireless cameras that best suit your needs. For example, our solar-powered wireless cameras are perfect for remote locations, while our 4G cameras offer connectivity in areas without Wi-Fi.
1.2 Check Your Wi-Fi Network:
- Ensure your Wi-Fi network is robust and covers the areas where cameras will be installed.
- If needed, consider upgrading your router or adding Wi-Fi extenders.
1.3 Gather Necessary Tools and Equipment:
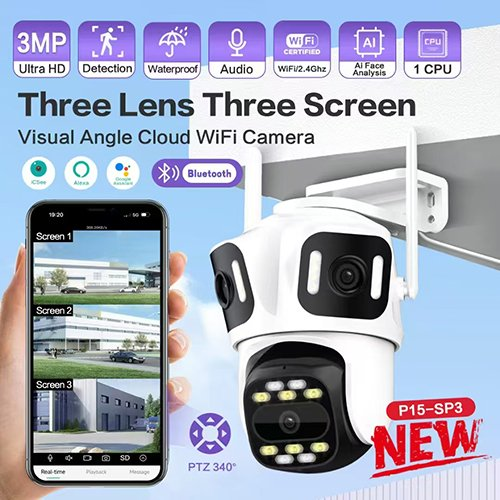
- Wireless security cameras (check out our range of wireless and solar-powered cameras)
- Mounting brackets and screws
- Power adapters or solar panels (if applicable)
- Smartphone or computer for setup
- Ladder or step stool (for mounting cameras)
Step 2: Choosing the Right Location for Your Cameras
2.1 Optimal Camera Placement:
- Position cameras at entry points (doors, windows) and high-traffic areas.
- Ensure cameras are placed high enough to avoid tampering but low enough to capture clear images.
- Avoid pointing cameras directly at light sources to prevent glare.
2.2 Consider Environmental Factors:
- For outdoor cameras, ensure they are weatherproof and placed under eaves for protection.
- For solar-powered cameras, ensure they are placed in areas with adequate sunlight.
Pro Tip: Watch our installation video on optimal camera placement to see real-life examples of how to position your cameras for maximum coverage.
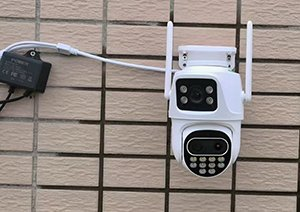
Step 3: Mounting the Cameras
3.1 Install Mounting Brackets:
- Use the provided screws and anchors to securely attach mounting brackets to walls or ceilings.
- Ensure brackets are level and firmly fixed to support the camera’s weight.
3.2 Attach the Cameras:
- Secure the cameras to the mounting brackets.
- Adjust the camera angle to ensure the desired field of view.
Video Support: Check out our step-by-step mounting tutorial video to see how to properly install and adjust your cameras.

Step 4: Powering the Cameras
4.1 Wired Power Connection:
- Connect the cameras to power adapters and plug them into nearby outlets.
- Use extension cords if necessary, but ensure they are safely routed to avoid tripping hazards.
4.2 Solar-Powered Cameras:
- Position solar panels in areas with maximum sunlight exposure.
- Connect the solar panels to the cameras as per the manufacturer’s instructions.
4.3 Battery-Powered Cameras:
- Insert the batteries into the cameras and ensure they are fully charged before installation.
Did You Know? Our solar-powered wireless cameras are designed for easy installation and long-lasting performance, even in remote locations. Watch our solar camera setup video to learn more.
Step 5: Connecting to Wi-Fi and Setting Up the System
5.1 Download the App:
- Download the camera manufacturer’s app on your smartphone or tablet.
5.2 Create an Account:
- Open the app and create a new account or log in to an existing one.
5.3 Add Cameras to the System:
- Follow the app’s instructions to add each camera to your system.
- This usually involves scanning a QR code on the camera or entering a unique device ID.
5.4 Connect to Wi-Fi:
- Select your Wi-Fi network and enter the password to connect the cameras.
- Ensure the cameras are within range of your Wi-Fi signal.
Video Tutorial: Our Wi-Fi setup video provides a detailed walkthrough of connecting your cameras to your network.
Step 6: Configuring Camera Settings
6.1 Adjust Camera Settings:
- Set up motion detection zones, sensitivity levels, and notification preferences.
- Configure recording settings (continuous, motion-activated, scheduled).
6.2 Test the System:
- Walk around the monitored areas to ensure the cameras are capturing the desired footage.
- Check the app to verify that live feeds and recordings are functioning correctly.
Step 7: Monitoring and Maintenance
7.1 Regular Monitoring:
- Regularly check the app to monitor live feeds and review recorded footage.
- Set up alerts to notify you of any suspicious activity.
7.2 Maintenance:
- Clean camera lenses periodically to ensure clear images.
- Check and replace batteries or solar panels as needed.
- Update the camera firmware regularly to ensure optimal performance and security.

Why Choose Shenzhen JER Technology Co., Ltd?
At Shenzhen JER Technology Co., Ltd, we are committed to providing top-notch security solutions tailored to your needs. Our product range includes:
- IP Cameras and Analog Cameras for high-quality video surveillance.
- DVRs and NVRs for reliable recording and storage.
- Wireless Cameras for easy installation and flexibility.
- Solar-Powred Wireless Cameras for eco-friendly, off-grid security.
- 4G Cameras for connectivity in areas without Wi-Fi.
We also offer OEM services, ensuring that our products meet the unique requirements of our global clients.
Conclusion
Installing a wireless security camera system is a straightforward process that can significantly enhance your property’s security. By following this step-by-step guide and utilizing our installation videos, you can ensure a successful setup. Whether you’re using IP cameras, solar-powered cameras, or 4G-enabled cameras, proper planning and setup are key to maximizing the effectiveness of your security system.
For more information about our products or to request a custom OEM solution, visit our website or custom OEM solution, visit our website or contact our team today. Let us help you build a safer future!

