

Setting up a license plate recognition (LPR) camera at your gate transforms your entrance from a manual bottleneck into an automated security checkpoint. Many property managers and business owners struggle with slow vehicle processing, unauthorized access, and high staffing costs at their gates. Install your LPR camera 1.5-2.5 meters high, 7-10 meters from the stop line, angled 15-30° downward. Connect the camera’s relay output to your barrier gate controller, configure your plate database, and test for 95%+ accuracy in controlled conditions. Now, let’s dive into the complete process that will have your automated gate system running smoothly and efficiently. My experience installing hundreds of LPR systems has shown me that proper setup dramatically improves both security and user satisfaction while reducing operational costs by up to 60%.
What Components Do You Need for an LPR Gate System?
I’ve learned the hard way that buying components separately often leads to integration nightmares. After dealing with countless compatibility issues, I now recommend starting with the core components and understanding how they work together.
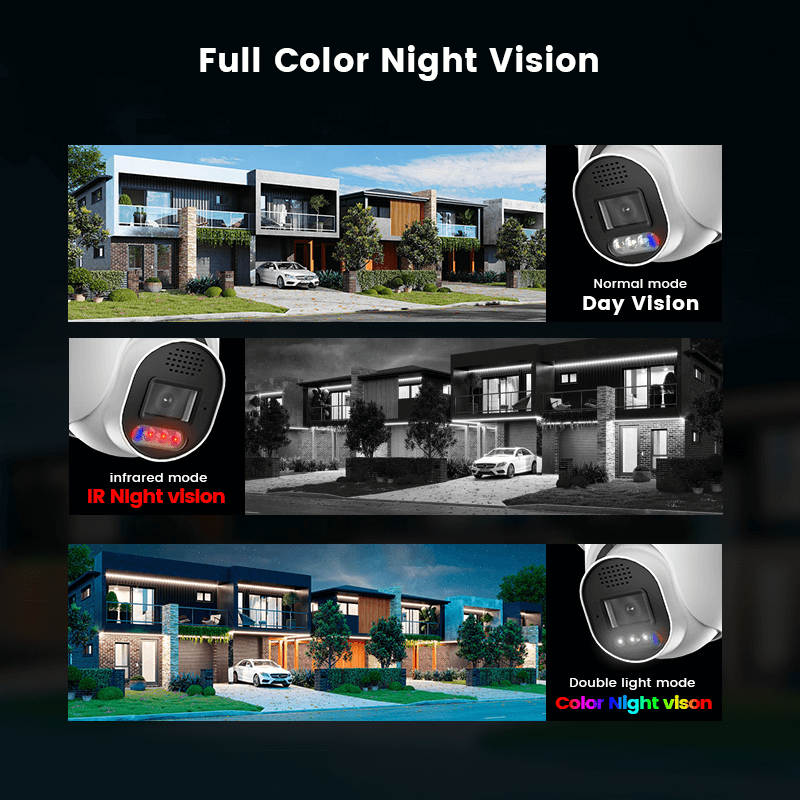
Your LPR camera with IR illumination forms the foundation of the entire system. Standard security cameras won’t cut it here – you need specialized optics designed specifically for plate recognition. The infrared capability ensures clear captures even in complete darkness, which regular cameras struggle with.
The barrier gate controller serves as your system’s brain, processing signals from the camera and triggering gate operations. This controller must communicate seamlessly with your LPR camera through relay connections. Most installations use either dry contact relays or RS-485 protocols for this critical link.
| Component | Typical Cost Range | Integration Complexity |
|---|---|---|
| LPR Camera | $800-2500 | Medium |
| Gate Controller | $300-800 | High |
| Management Software | $200-1000 | High |
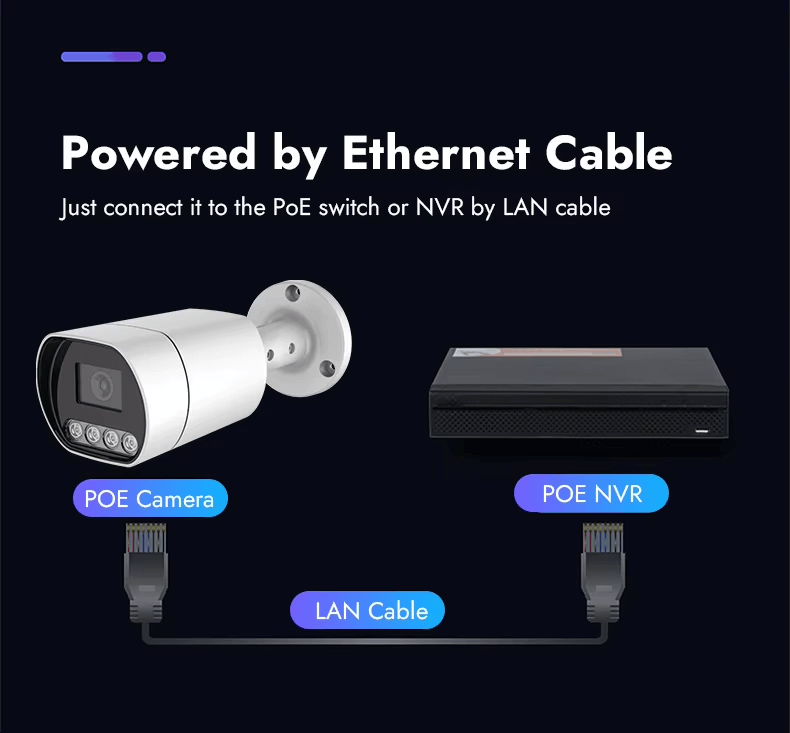
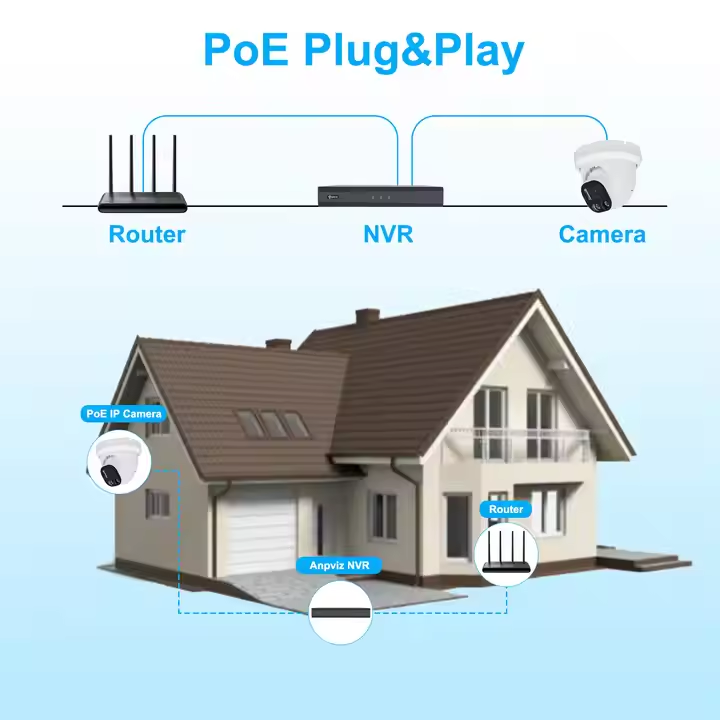
Your network infrastructure needs to handle real-time data transmission without delays. I recommend dedicated network switches rather than sharing bandwidth with other systems. The management software with database capability ties everything together, storing authorized plates and logging all access events.
Companies like Shenzhen JER Technology offer integrated solutions that eliminate the guesswork. Their matched components communicate flawlessly, saving you from the headaches I’ve experienced with mismatched hardware. For specific integration questions, their technical support team can provide detailed compatibility matrices.
Where Should You Position Your LPR Camera for Maximum Accuracy?
Getting your camera placement wrong turns even the best equipment into expensive paperweights. I’ve troubleshot enough failed installations to know that positioning mistakes cause more headaches than all other issues combined.
The height sweet spot sits between 1.5-2.5 meters. Mount too low and you’ll catch bumpers instead of plates. Too high and the angle becomes too steep, creating shadows that block character recognition. I learned this lesson the hard way after a client’s camera at 3.5 meters couldn’t read a single plate properly.
Distance matters tremendously – position your camera 7-10 meters from where vehicles stop. Closer than 7 meters creates harsh viewing angles that distort plate characters. Further than 10 meters shrinks plates too small for reliable recognition, especially on older or dirty plates.
| Camera Angle | Recognition Accuracy | Common Issues |
|---|---|---|
| 0-15° horizontal | 95-98% | None |
| 15-30° horizontal | 85-92% | Occasional misreads |
| 30°+ horizontal | Below 80% | Frequent failures |
Keep horizontal angles under 30 degrees and maintain a 15-30 degree downward pitch. This geometry avoids headlight glare while maintaining clear character visibility. Single-lane coverage works best – splitting attention across multiple lanes typically drops accuracy below the 90% threshold needed for reliable gate automation. Professional installation teams understand these physics and can help optimize placement for your specific traffic patterns.
How Do You Connect the LPR Camera to Your Barrier Gate?
The wiring connection between your camera and gate controller makes or breaks the entire operation. I’ve seen perfectly positioned cameras fail because someone skipped the relay configuration step or used incompatible voltage levels.
Most LPR cameras provide dry contact relay outputs that handle 12V or 24V switching signals. These relay contacts close upon authorized plate detection, sending a trigger signal to your barrier gate controller. The simplicity is elegant – no complex protocols or network configurations required.
Timing configuration prevents traffic backups and security gaps. Set your gate delay between 3-8 seconds based on lane length and typical vehicle speed. Too short, and cars get trapped halfway through. Too long and tailgating become inevitable. I typically start with 5 seconds for standard passenger vehicle lanes.
| Gate Type | Recommended Timing | Voltage Requirement |
|---|---|---|
| Swing Arm | 3-5 seconds | 12V/24V DC |
| Sliding Gate | 5-8 seconds | 24V DC |
| Rising Bollard | 4-6 seconds | 12V/24V DC |
Connect the camera’s relay common and normally open contacts to your gate controller’s input terminals. Double-check voltage compatibility before powering up – mismatched voltages can damage sensitive controller circuits. JER Technology’s systems come pre-configured with optimal relay timing, eliminating guesswork and reducing installation errors that cause operational headaches.
What Software Configuration Ensures Reliable Operation?
The software configuration separates functional systems from frustrating failures. I’ve watched perfectly installed hardware become useless because someone rushed through the database setup or ignored exposure settings.
Your plate database serves as the system’s memory and decision-making center. Create separate whitelists for residents, employees, and regular visitors with permanent access. Blacklists should include problem vehicles, expired permits, or security threats that require immediate alerts. Guest lists handle temporary access for deliveries, contractors, or short-term visitors.
Detection zone configuration focuses your camera’s attention where it matters most. Draw a precise rectangular zone covering only the license plate area of stopped vehicles – typically 2-3 meters wide by 1 meter tall. Zones that are too large trigger on shadows, adjacent lanes, or passing pedestrians.
| Configuration Setting | Day Optimization | Night Optimization |
|---|---|---|
| Exposure Time | 1/500 – 1/1000s | 1/100 – 1/250s |
| IR Illumination | Auto/Off | Always On |
| Gain Settings | Low (0-30) | Medium (30-60) |
Day and night exposure settings require different approaches. Daytime needs fast shutter speeds to freeze motion clearly. Nighttime requires longer exposure with infrared illumination to capture reflective plate materials. Professional LPR systems include automatic exposure adjustment, but manual fine-tuning often improves performance. Regular database backups prevent catastrophic data loss – schedule automatic exports to secure locations and test restoration procedures quarterly.
How Do You Test and Optimize System Performance?
Testing separates systems that work on paper from those that perform reliably under real conditions. I’ve seen too many installations that passed initial tests but failed miserably once actual traffic started using them.
Run comprehensive vehicle tests with at least 100 different vehicles representing your actual user base. Clean demonstration cars won’t reveal how your system handles muddy plates, faded numbers, or unusual fonts. Test during different times of day, weather conditions, and approach angles to identify weak spots.
Performance optimization requires patience and iteration. Start with manufacturer default settings, run your test vehicles, document every failure, adjust camera positioning or software settings, then test again. This cycle might repeat 3-5 times before achieving consistent 95%+ accuracy.
| Test Condition | Expected Accuracy | Common Adjustments |
|---|---|---|
| Clean plates, daylight | 98-99% | Fine-tune detection zone |
| Dirty plates, daylight | 92-95% | Increase contrast settings |
| Night conditions | 90-94% | Optimize IR illumination |
Environmental factors impact performance significantly. Rain creates reflections, snow obscures plates, and seasonal sun angles change lighting throughout the year. Plan for monthly accuracy reviews and quarterly maintenance including lens cleaning and software updates. Professional support teams can help establish testing protocols and optimization procedures that maintain long-term system reliability.
What Common Mistakes Should You Avoid During Installation?
I’ve witnessed enough installation disasters to know that preventable mistakes cause most LPR system failures. The same errors appear repeatedly across different sites, turning promising projects into expensive lessons.
Height and angle mistakes top my list of costly errors. People mount cameras at 4-5 meters thinking higher means more secure, but this creates viewing angles so steep that characters become unreadable shadows. Stick to the 1.5-2.5 meter range religiously – I’ve never seen a successful installation outside these limits.
Multi-lane coverage attempts fail spectacularly in real-world conditions. One camera trying to cover two or three lanes results in plates that appear too small, overlap each other, or disappear entirely behind larger vehicles. Each lane needs dedicated camera coverage for reliable operation.
| Common Mistake | Failure Rate | Repair Cost |
|---|---|---|
| Mounting too high | 85% | $500-1500 |
| Multi-lane coverage | 75% | $800-2000 |
| Poor weatherproofing | 60% | $300-800 |
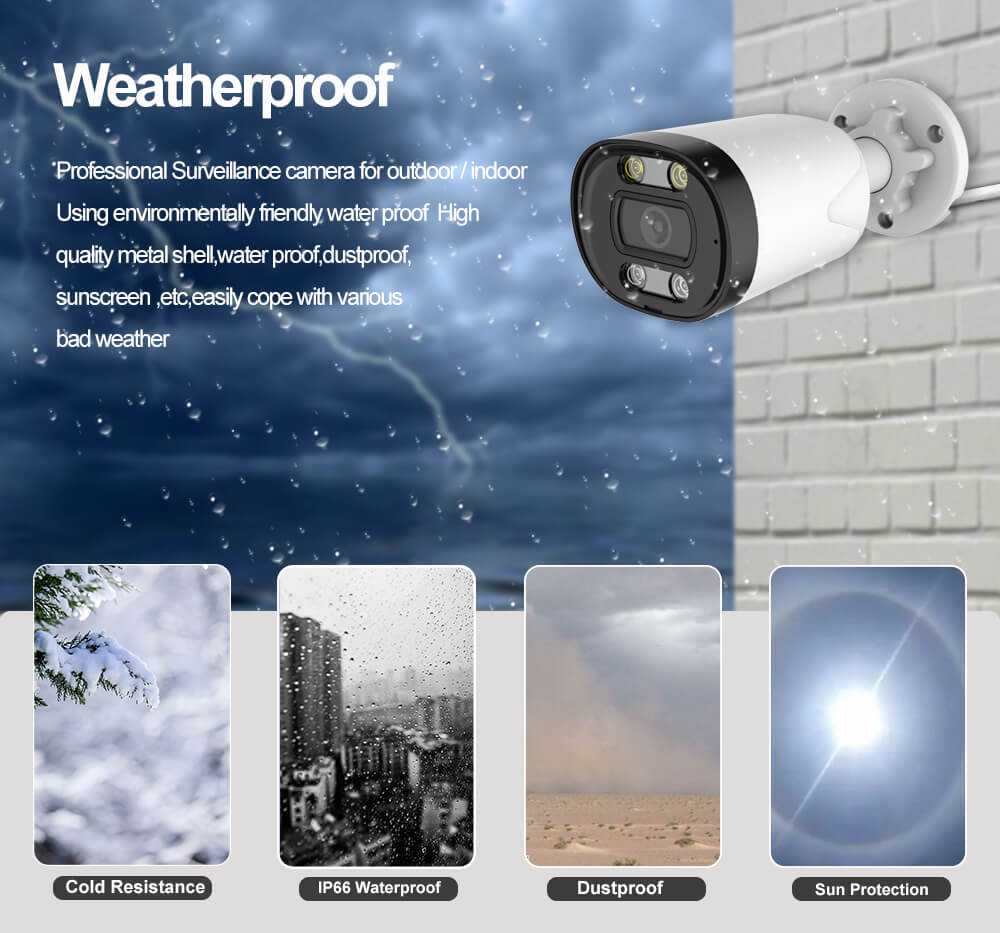
Weatherproofing shortcuts cause expensive failures during the first heavy rain or winter freeze. Use proper IP66-rated enclosures and cable glands – moisture damage often requires complete equipment replacement. Network infrastructure planning prevents remote access headaches later. Experienced suppliers like JER Technology provide installation checklists that eliminate these common pitfalls, saving you from costly do-overs.
Conclusions
Setting up an LPR camera at your gate requires attention to positioning, proper component selection, careful software configuration, and thorough testing. When done correctly, these systems provide years of reliable automated access control with accuracy rates exceeding 95%. Take time during planning and installation to avoid common mistakes that plague many deployments.
